By JASON LIOH
alltherage@thestar.com.my
PORTRAITURE photography is one of the most common genres that most new and young photographers want to pick up; with humans as subjects – particularly female models.
However, many do not realise that portraiture photography is also one of the toughest genes to master due to the amount of variables involved which can make or break a photo.
There are many elements such as lighting, composition, expression, poses, focus point, depth of field, focal length, facial expression and emotion that a photographer must take into consideration in creating a beautiful portrait.

You can use objects around you to frame your subject.
I am no expert in portraiture photography. In fact, it is my least favourite genre and I tend to avoid this particular type of photography due to its difficulty and complexity.
However, these are a few guidelines that I adhere to in order to get the best out of my shoots and I hope that they will be useful to you as well.
Right lens/focal length
There are dedicated portrait lens such as the 50mm, 85mm and 105mm prime lens that are excellent for portrait photography.
There is virtually no lens distortion that will make your subject fatter when placed at the far corner of your frame.
The sharpness of these lenses will show the finer details of your subject, such as eyebrow, lip, eye and hair. The shallow depth of field will help you isolate your subject from the background easily as well. However, a tele-lens can also double as portrait lens.
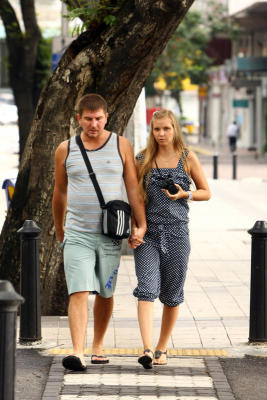
A couple holding hands as they strolled along the streets of KL.
Focus point
The eyes are the windows to one’s soul, so always set your focus point on your subject’s eye.
If you are using a fast lens (lens with aperture of less than F2.8), it is even more crucial that you get your focus point right as the shallow depth of field can easily throw your photo out of focus. That may just ruin everything for you. If you are shooting a full body length photo, your focus point should be your subject’s face.
Depth of field
This is determined by your aperture value. The smaller the aperture value, the shallower your depth of field will be.
Depending on what you are planning to achieve in your photo, aperture values from F1.4 to F8 are all ideal and usable for portraiture photography.
If you want a clearer and sharper image, choose a large aperture value and vice versa if you want a blurry background.
Lighting and exposure
It is important that you do not over expose your photos to prevent losing out the finer details of your subject.
Zoom in on your camera display to take a closer look at the photo. Check all the finer details before moving on to the next pose.
Not everyone has the luxury of using studio lighting to light your model. That’s why, natural lighting, especially in the morning and late evening is ideal for portraiture photo shoot.
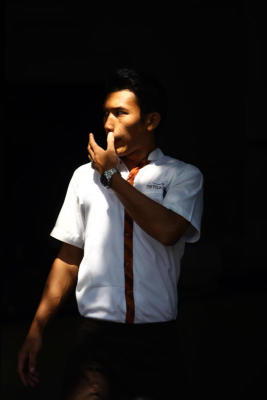
The directional morning sunlight makes interesting lighting on the subject.
Directional sunlight is softer, less harsh and gives a “3D feel” to your subject in your photo.
If you are planning on doing an outdoor photo shoot, scout the area a few days before to see the direction in which the sun rises and sets.
A reflector panel is useful in reflecting light onto your subject, especially to areas where the sunlight cannot reach. The panel is rather cheap and can be found in any camera accessory store.
Facial expression/emotion
While facial expression and emotion are very subjective and abstract, the easiest way to get what you want for your photo is to communicate with your model.
Also, getting a model who poses well will also ease your job as a photographer. You’d be surprised at how a simple smile could change the mood of a photo easily.

Communicate with your model and conveying your ideas and thoughts as much as possible is the key in getting the photo you want.
Rule of third/composition
This is a common guideline for composing photos. It suggests a photographer should not place his subject right in the middle of his “frame”, but one third to the left or right.
Every camera, even phone and compact cameras, has a grid function in it. Upon enabling, your screen will be split into 3×3 boxes and the rule of third states that you should place your subject on the areas where lines intersect.
One should also be on the lookout for distracting objects in the background and around your subject. You do not want a tree branch “growing” on your subject’s head or a pile of rubbish on the bottom left of your photo. A clean background is ideal in portrait photography as it will not create a distraction from your subject.
These are the few really simple guidelines I follow when I am shooting human portraiture.
This is something that you have to practice consistently and, more importantly, learn from your mistakes. No amount of tips and guidelines will help you unless you put them into practice.
Leave a reply